iOS
Requirements
- iOS 12 and above
- CPU architectures:
arm64,arm64e - Simulator architectures:
arm64,x86_64
Basic integration
Updating the SDK? Check out our CHANGELOG and Migration Guide to see what's changed.
Add HyperTrack SDK to your project
Swift Package Manager
Select File > Add Package Dependencies...and enter this URL https://github.com/hypertrack/sdk-ios in the search field to install the dependency.
CocoaPods
If you don't have CocoaPods installed, you can install it here.
Using command line run pod init in your project directory to create a Podfile. Put the following code (changing target placeholder to your target name) in the Podfile:
platform :ios, '12.0'
inhibit_all_warnings!

target 'YourApp' do
  use_frameworks!
  pod 'HyperTrack', '<version>'
end
Run pod install. CocoaPods will build the dependencies and create a workspace (.xcworkspace) for you.
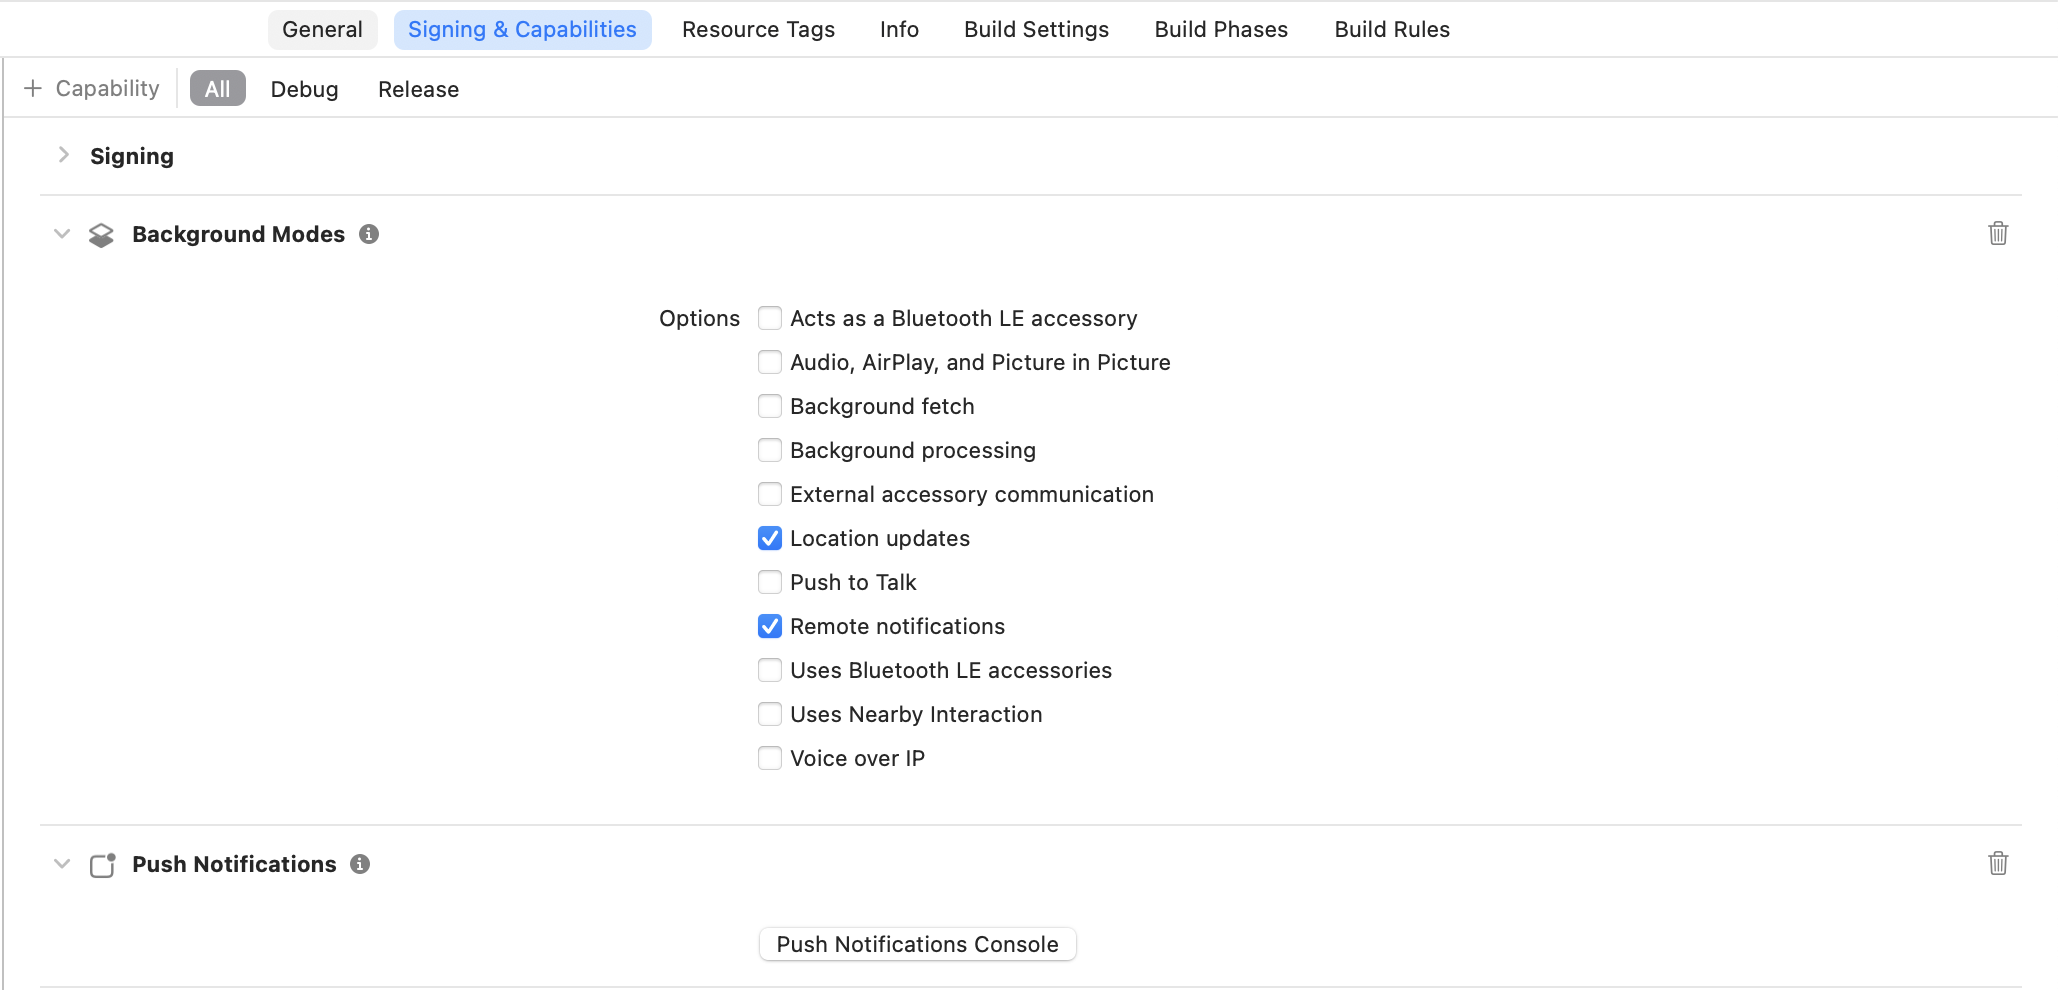
Enable Background Modes
Enable Background Modes in your project target's "Signing & Capabilities" tab.
- Choose "Location updates" and "Remote notifications".
- In the same tab, ensure that Push Notifications is added.
Add purpose strings
Set the following purpose strings in the Info.plist file:

The key names are as follows:
NSLocationAlwaysAndWhenInUseUsageDescriptionNSLocationWhenInUseUsageDescriptionNSMotionUsageDescription
Purpose string should explain the value that location tracking provides.
HyperTrack SDK requires "Always" permissions to reliably track user's location.
Be advised, purpose strings are mandatory.
Your app needs to make sure that it has location permissions for location tracking to work. See this section for details on permissions best practices.
Motion permission is recommended but not required. If granted, the worker timeline will have improved activity detection.
Set up silent push notifications
We use silent push notifications to wake up the app when work is assigned to a driver or to prevent tracking interruptions.
Enable push notifications capability
Check the iOS documentation on APNs for the instructions.
Get the APNs key
You can create or download the existing key in your Apple Developer Account settings
Add APNs ket to HyperTrack dashboard
Log into the HyperTrack dashboard, and open the setup page. Upload your Auth Key (file in the format AuthKey_KEYID.p8) and fill in your Team ID.
Set the publishable key
Get your publishable key from the Setup page.
Put the publishable key in your app's Info.plist as HyperTrackPublishableKey key with type String and the value obtained above.
Set Worker Handle
To link a Worker with the device you should set the worker handle:
HyperTrack.workerHandle = "user_id" // unique user identifierSee Worker Setup guide for more information.
Grant the permissions to the app
To start tracking the app requires Location permissions. You have to grant them in Settings > Privacy > Location Services > ...Your App... > Allow Location Access > Always.
Also make sure that Location services and Precise location switches are on.
Start Tracking
Now the app is ready to be tracked from the cloud.
Follow the Track Work tutorial to learn how to control device tracking from your backend.
Dashboard
Once your app is running, go to the dashboard where you can see a list of all your devices and their live location with ongoing activity on the map.
Recommended additional steps
Identify devices
You can tag devices with names that will make it easy to distinguish them on HyperTrack Dashboard.
HyperTrack.name = "Device name"You can additionaly tag devices with custom metadata (and filter them in the Dashboard using metadata fields). Metadata should be representable in JSON.
HyperTrack.metadata = ["key": "value"]Handle errors
Use the errors query or subscribeToErrors subscription to make sure that when the driver navigates to the screen where tracking is supposed to happen, there are no blockers that can interrupt it.
You can use subscription API to be able to react immediately when errors come up:
// The lifetime of this value is linked to the lifetime of subscription.
// Usually is declared as a property of a ViewController.
var errorsCancellable: HyperTrack.Cancellable? = nil

errorsCancellable = HyperTrack.subscribeToErrors { errorsSet in
  for error in errorsSet {
    switch error {
    case .location(.permissions(.denied)):
      // Handle case when location permissions are denied
    case ...
    }
  }
}
Or by querying the API only when needed:
for error in HyperTrack.errors {
  switch error {
  case .location(.permissions(.denied)):
    // Handle case when location permissions are denied
  case ...
  }
}
See Error API Reference for a full list of errors.
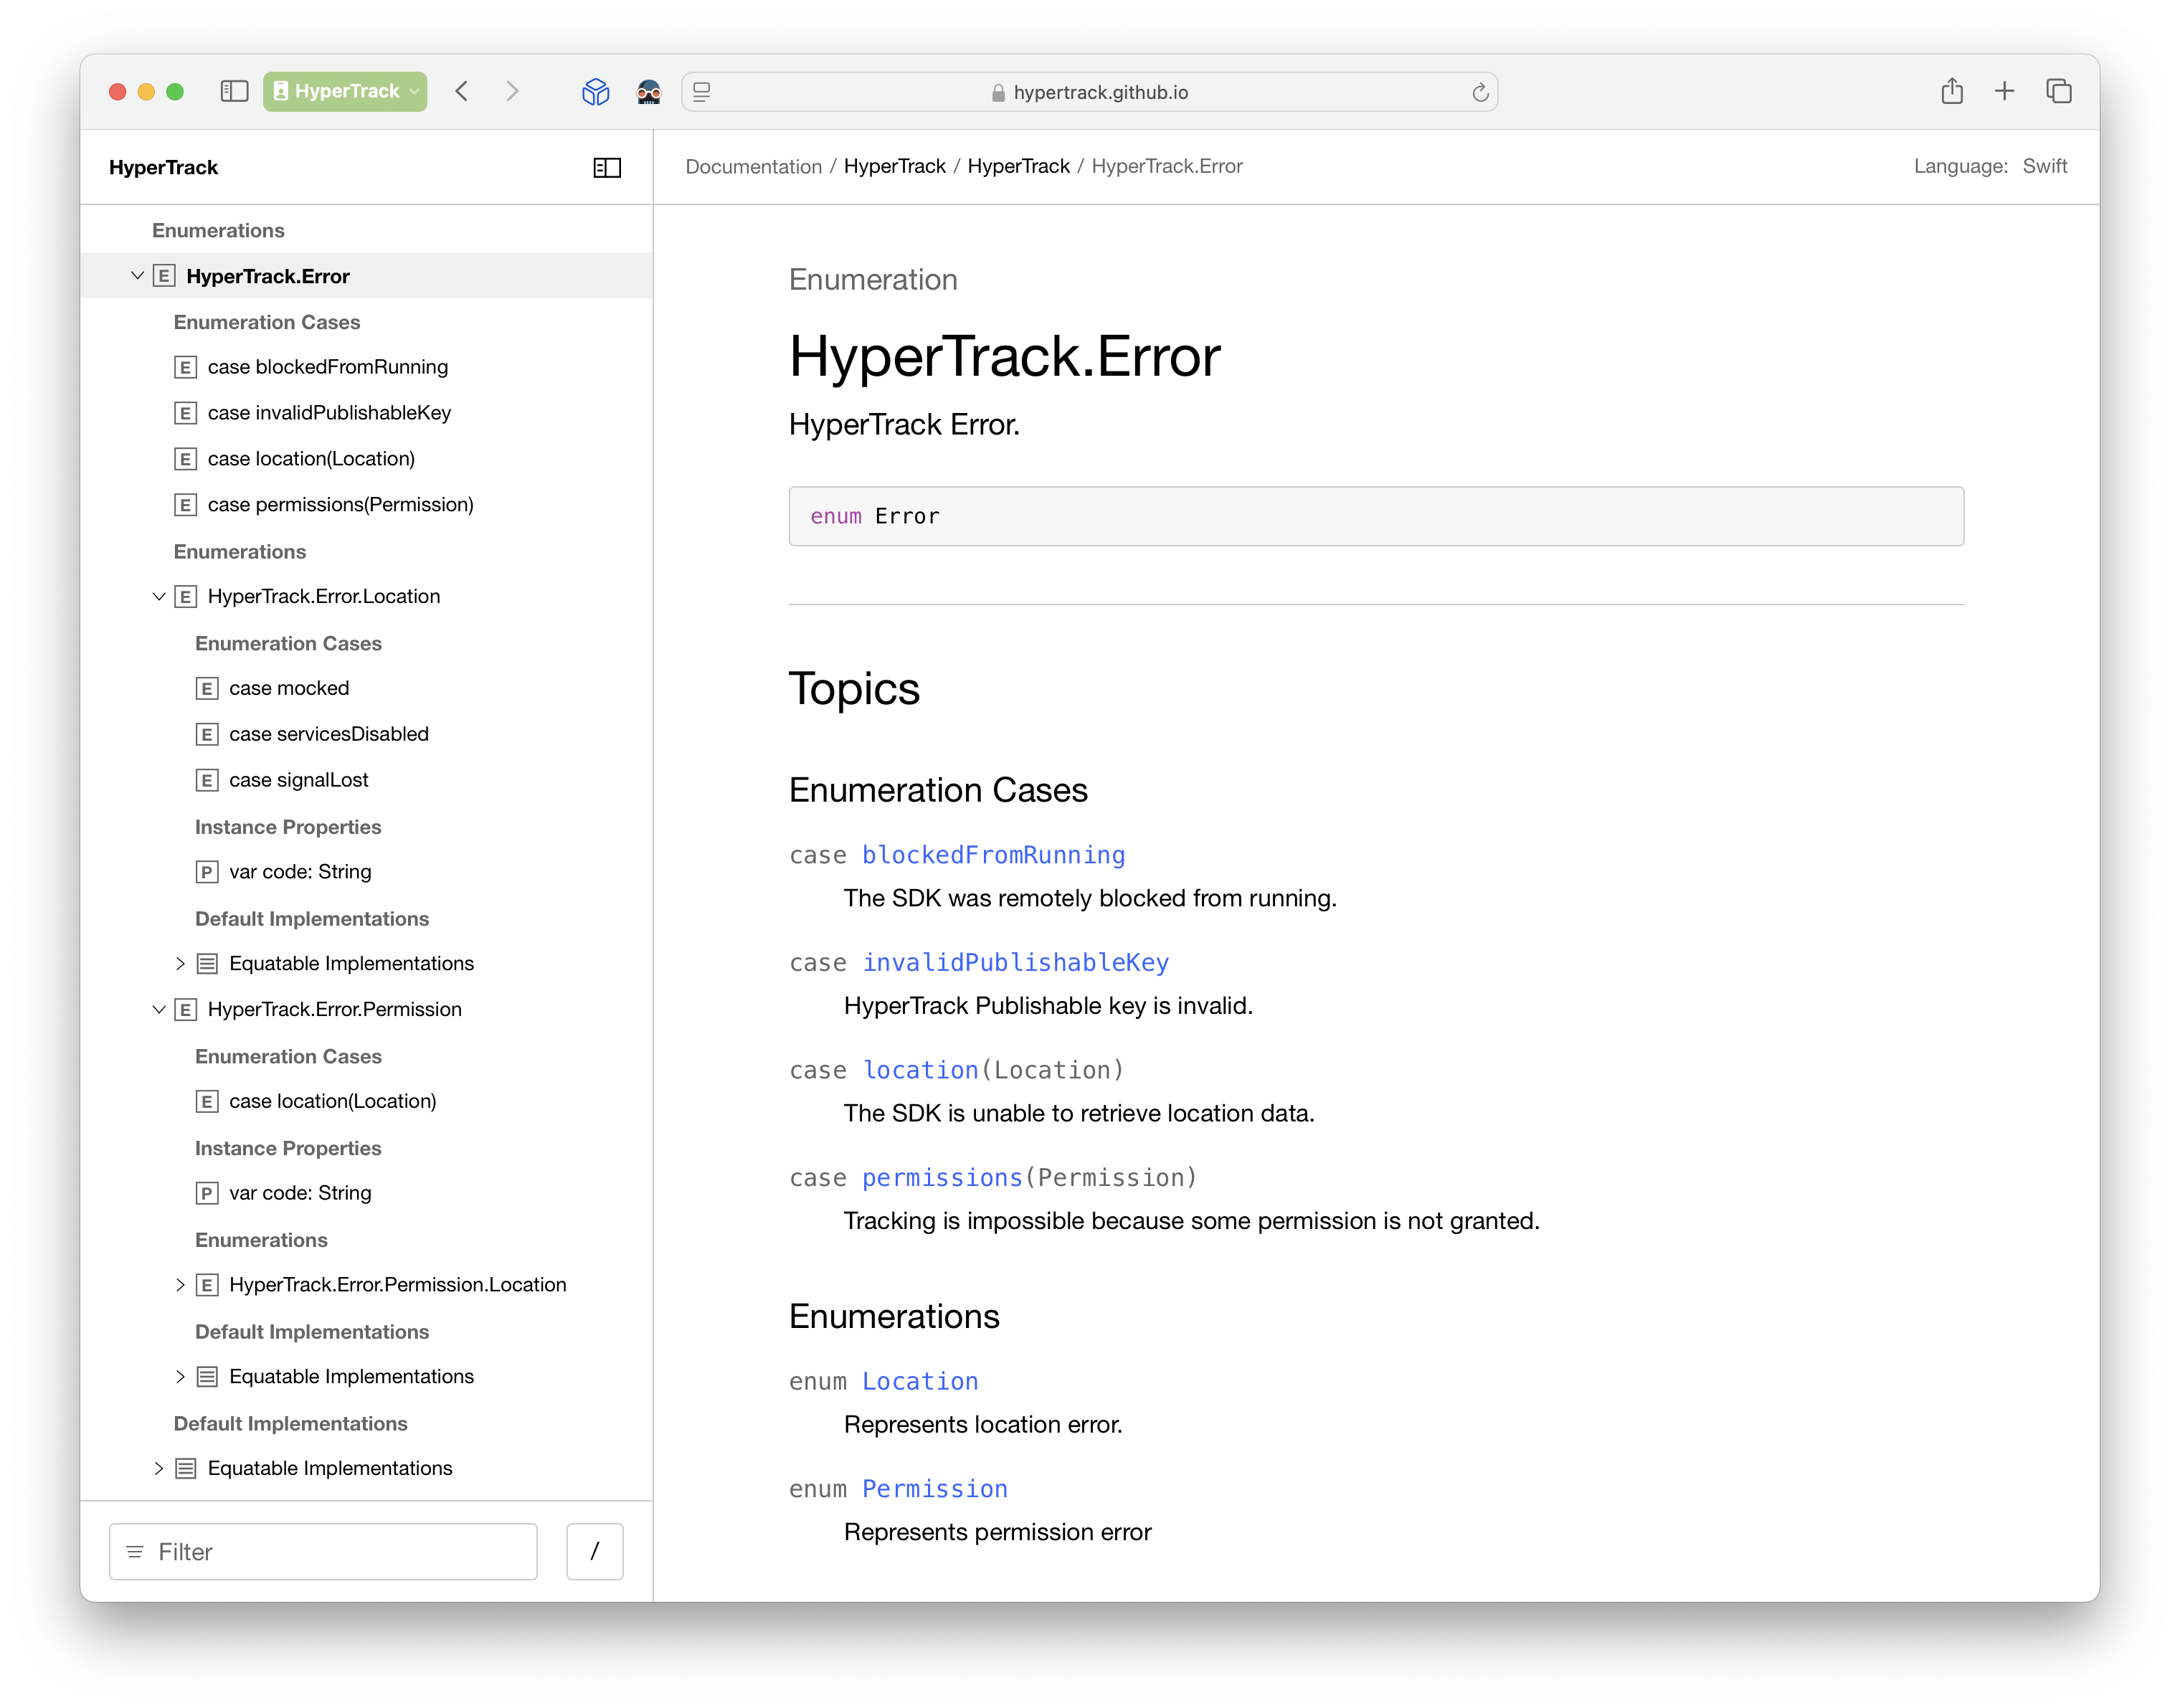
Reference
For a full SDK API reference see HyperTrack iOS SDK Reference
SDK integration examples
To learn more about SDK integration examples, you may visit these resources:
Support
Join our Slack community for instant responses.